This week I have split my free time between a small game and gradually adding to my collection of AWI militia. The latter will go onto round bases in groups of three as I build-up units with the aim of specific use in battles with a lot of skirmishing activity, such as Lexington/Concord, St Leger's campaign of 1777, etc. I have plenty of militia on rectangular bases already but I'd not rule out adding more of those in the future.
The game is based very loosely on the British Grenadier! scenario, but played with my Bloodybacks! rules. Clearly no set of AWI rules is complete without an exclamation mark. When I say loosely I do mean this.
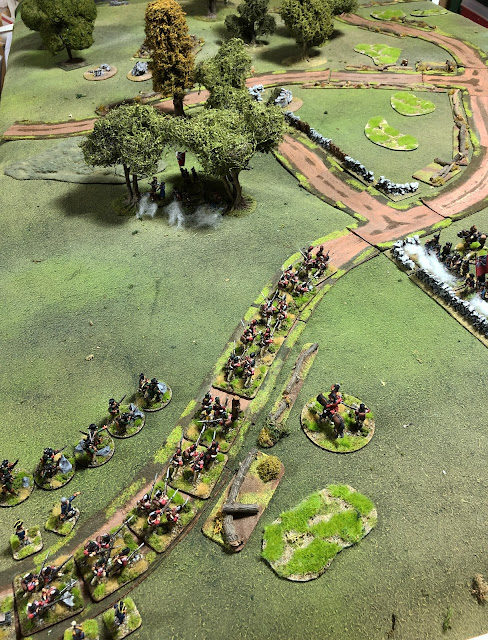
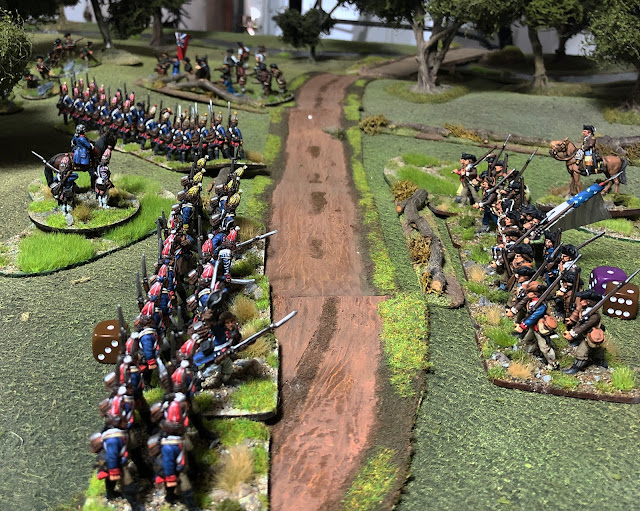
The setting is New York, 1776. A battalion of British light infantry in two wings is advancing north along a road lined with stone walls and heavy logs amidst wooded farmland with fields similarly edged with hard cover. A battalion of Hessian grenadiers also in two wings is due to arrive along a second road than joins the main one. They won't arrive immediately though. The light infantry are accompanied by a detachment of Hessian jagers and a section of Royal Artillery 3-pounders. Opposing the crown is a small brigade of continental infantry consisting of three small regiments supported by a section of light guns and a few militia.
Commanders on both sides are of good quality, as are the majority of the troops, so this is set up to be quite a stubborn action.
Orders of Battle:
Crown:
Lt.Col. Musgrave (Q4), British light infantry (Q4) in two wings each of size 4 and density 5, Jagers (Q4) in one unit of size 2 and density 3, Royal Artillery (Q4) manning one section of 3 pdr guns
Lt.Col. Von Linsing (Q3), Hessian grenadiers (Q4) in two wings each of size 4 and density 8
Rebels:
Col. Glover (Q5), 3rd and 13th Continental infantry (Q4) as two units of size 4 and density 6, 26th Continental infantry (Q3) as one unit of size 4 and density 6, Connecticut militia (Q2) as one unit of size 2 and density 3, Continental artillery (Q3) manning one section of 3 pdr guns
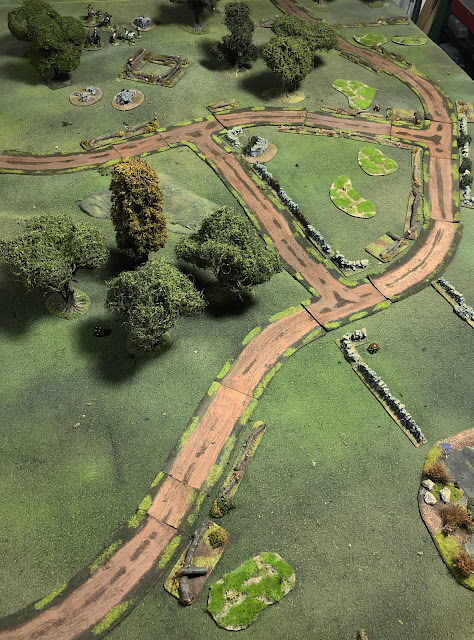
Below we see the view from the southern end of the table, close to the British entry point. The exit is in the north at the top of the table, just over a small wooden bridge. The expected Hessians will arrive from the road along the left (west) edge. Defending units are concealed behind walls and in woods.
Stone and log barriers are counted as hard cover.
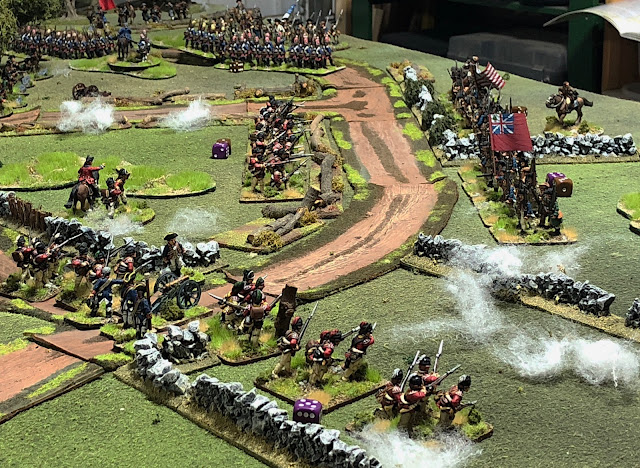
The British entered at the start of turn 1 and immediately came under fire from the militia skirmishers in the woods and from the 13th Continentals who popped up from behind their wall. The jagers chased off the militia and spent the majority of the battle in this pursuit. The leading light infantry wing was staggered and although it recovered to an extent the firefight with the Continentals was attritional and the stone walls gave the defenders a real advantage and in next to no time (well, about 30 minutes) the unit had lost 5/6 of its stamina and was going nowhere.


Great report, Steve, and an excellent looking game.
ReplyDeleteGiles
Thanks, Giles!
DeleteWonderful brushwork, handsome table layout,great scenario.
ReplyDeleteTrifecta.
I have a few AWI with some recent adds to do some scenarios based on the early pa rt of the conflict. Now I have some inspiration as well.
Thank you. Hopefully I'll have some more 1775/1776 games to show soon.
DeleteTop work as always Steve!
ReplyDeleteGreat pictures as always.
ReplyDeleteThx for the rules, I've tried them a few times and have found them great fun. Yesterday we had a large game and a number of queries came up (not surprising ). I know these rules are for your own use but was wondering what you do in these circumstances.
Firstly do you allow units an arc of fire or must they fire straight ahead? I allowed a 45' arc if no targets were directly in front of the unit , measuring from each base to determine the number of bases that could actually fire.
How do you handle multiple unit melee- if you attempt to charge 2 units each with a different number of disruption points how do you work this out. We had considered working it out against the unit with the least DP's.
Do you allow oblique movement?
The rules worked really for a biggish game and everyone enjoyed them. Personally i think the activation system is inspired.
Stephen
Hi. Thanks for the questions and I'm glad you are enjoying the rules (well, guidelines at least). Answers apply to v8 of the rules - but could probably work for v7 too. The rules were designed to handle large and small games, played solo quite a lot of the time, without inducing migraine. It's good to hear they have given you a quick game too, even with the limitations of not being inside my head :-) It's always hard to make sense of someone else's writing!
DeleteFor multiple unit melee situations I don't think I have a single answer. Where the two defending units are similar in quality, then I might fight it all as "one mob versus another mob", averaging things here and there. However where there is a significant difference my preference would be to temporarily split the larger attacking unit into two parts and fight two melees. After resolution, recombine the two parts with the whole unit having DPs equivalent to the worst of the two. If one part routs then it will take the rest with it. I'm sure you can fill in the blanks. Whatever gives the most plausible narrative is probably best.
I limit the arc of fire for musketry, allowing 22.5 degrees or so either side, but that is just personal preference and I'd allow more freedom for skirmishers.
Rather than oblique movement I use two wheeling movements instead. It reduces the overall distance moved, but is probably more in keeping with the training of the units involved. Potentially quality 4 or 5 infantry could be allowed to oblique if you wanted to allow this in some way.
Hope you continue to enjoy the rules!
Steve
ReplyDeleteThx for your replies.
It was version 8 we used but i have tried the earlier versions as well.
No headaches with these rules tbh., they are rather slick.
Your suggestions on fighting multiple unit melees were similar to our thoughts.
Thx again
Stephen