This is the latest iteration of Bloodybacks! There are minor changes from the previous version, with the most significant changes being to the charge/melee section to put more of the variable factors into the calculation of impetus rather than the melee resolution and to force defenders to test their cohesion if the attacker has sufficient impetus, with a chace that they will not stand to fight.
"Morale tests" have now been divided into two types. Morale tests are still based on Unit Quality x 2, Cohesion tests are based on Unit Quality + Unit Density, favouring units in more compact formations.
The riles for commander activation and initiative have had a tidy-up and some re-naming of the concepts
Do remember that this is not a commercial rule set, just an assembly of the mechanisms that I use for gaming the AWI with my own collection. They do not cover all eventualities and a sense of "playing the history" is encouraged.
List of amendments:
BLOODYBACKS! - Version 9.3
These rules being are a set of my own devising. I have been writing and testing rules for the AWI for many years, using the “Bloodybacks!” title despite significant shifts in design. One version was published in Wargames Illustrated #188 (May 2003) but the current rules bear little resemblance to those other than the basing and unit organisation. The rules are intended for games played in a friendly manner. They would not suit competitive play.
Readers who are interested in the probabilities generated by some of the dice mechanisms contained in the rules can read more on a specific blog page covering the subject. Concepts and definitions
Scales
Units are usually organised on a ratio of one figure representing 10 actual men, and one model gun representing two actual pieces, although for specific scenarios I do vary this from 1:15 to 1:13, even ging to 1:20 on rare occasions. The ground scale is approximately 10” representing 100 yards.
A game turn equates to around 5 minutes of real time.
Quality
Both units and commanders are rated for their quality in Bloodybacks. Along with unit density, this is critical to the mechanisms of the game.
In both cases, quality is rated on a scale of 1 (worst) to 5 (best).
Command quality (CQ) represents the ability of a commander and his staff to inspire and influence the units under his command. Most “average” commanders should have a command quality of 3. If above average use 4 and below average use 2. Reserve the extreme ratings for absolute incompetents or truly heroic tactical geniuses.
Unit quality (UQ) represents the skill and staying-power of a unit. Quality 1 represents levy units with little or no training, Quality 2 represents the majority of trained militia. Quality three represents second-line regular troops or experienced militia. Quality 4 is for first-line regulars and Quality 5 is for the highest quality, experienced units (not those merely with a high opinion of themselves).
Most units will have the same quality in all situations. The exception is indians who will tend to have a higher quality when in woods and a lower quality in other terrain (I suggest 4 or 5 in the former and 1 or 2 in the latter, to be determined by scenario)
The combination of high quality commanders and units will create powerful effects on the battlefield. On the other hand, placing levy and militia in the command of a nincompoop is likely to result in a short-lived battlefield performance.
Activity Rating
In addition to their CQ, each commander in the game is assigned an Activty Rating (AR) rated on a scale of 2 (worst) to 5 (best). This represents the ability of the commander to react to events and issue direct orders to nearby units. In many cases the AR will be the same as the CQ, but this can be varied in a scenario to reflect the number of units commanded and the individual personality of the commander.
Density
The most idiosyncratic aspect of the rules is unit density. I feel this helps to model some of the critical differences in doctrine between different forces engaged in the war. The “standard” density is “6”, indicated by 6 figures mounted on a 60mm wide base. Alternatively five figures on a 50mm frontage or 4 on a 40mm frontage represent the same density of “6”. This density typically represents men formed shoulder-to-shoulder in two ranks. The same density is used for cavalry mounted as 3 horses and riders on a 60mm frontage (or two on 40mm)
Units in “loose files” are given a density of 5. I usually model this as 5 figures on a 60mm frontage or 4 on 50mm. This is used for the majority of British units from 1776 until close to the end of the war, when formations might have tightened up again.
Where units adopted the close order seen on the continent; shoulder-to-shoulder in three or more ranks, a density of 8 is used. I use this for most Hessian and French units, basing 6 infantry on a 50mm frontage.
Units who are dispersed/skirmishing have a density of 3. For those accustomed to Napoleonic wargaming, please note that the AWI did not feature “skirmish screens”, but units were dispersed at times with order such as “to trees”.
Units may reduce their density by separating their bases to an appropriate distance. Density can never be lower than 3 however.
This complicated sounding system is summarised in the table below:
| Description |
Density |
Suggested basing |
| Close Order 3-ranks |
8 |
8 figures on a 60mm frontage
6 figures on a 50mm frontage |
| Close Order 2-ranks |
6 |
6 figures on a 60mm frontage
5 figures on a 50mm frontage
4 figures on a 40mm frontage |
| Loose Order 2-ranks |
5 |
5 figures on a 60mm frontage
4 figures on a 40mm frontage
|
Open Order 2-ranks
Native "mobs" |
4 |
4 figures on a 60mm frontage
3 figures on a 40mm round base |
| Extended Order/Skirmish |
3 |
3 figures on a 60mm frontage
2 figures on a 40mm frontage
2 figures on a 40mm round base |
| Cavalry |
6 |
3 mounted figures on 60mm frontage
2 mounted figures on 40mm frontage |
| Crews |
3 |
However you like! I tend to base as individual figures |
Unit size
Unit size relates to the number of model figures in the unit (mounted figures count as two).
Artillery are given a nominal size when shooting that depends on the figure:man ratio used in the game, range and ammunition type. In melee they fight with their actual models.
Disruption points
Units can suffer Disruption Points (DRPs) during the game. These can be removed through rallying. A unit cannot have more than 3 DRPs at any time.
Unit stamina
Units will gain stamina hits due to melee or from shooting hits in excess of their 3DP allowance
Stamina hits affect the unit's "to succeed" number when taking morale tests
I use different colour dice to mark DRPs and stamina hits next to units on the tabletop.
Activation deck
The activation of commanders and the units under their control is determined by drawing cards from the activation deck. The deck is composed of ten ordinary playing cards; Ace through 5 of a red suit and Ace through 5 of a black suit. The first card drawn in each turn will determine the turn length and when any random events occur (depending on the scenario).
Sequence of Play
- Determine activity level for each commander
- Shuffle the activation deck
- Draw the first card to determine the turn length and any random events
- Act with any commanders activated by the card drawn
- Continue to draw cards and activate commanders until all cards have been drawn
- Resolve any melees that have been deferred during the turn
- Start next turn
Determine commander activation level
At the start of each game turn roll one average die (D5, numbered 2, 3, 3, 4, 4, 5) for each commander.
If the roll is greater than the commander's AR then he has an activity level of ONE for the turn, otherwise he is awarded an activity level equal to the roll on the D5.
The commander is also given a number of Command Points that can be used to issue additional orders to units of his command who activate this turn. The number of Command Points is half the activity level (rounded up)
Example: Colonel Webster has an impressive AR of 4. His D5 roll is a "3", so he has and activation level of THREE and has two Command Points to use this turn as the roll of 3 is not greater than his AR.
Example: Colonel Stevens has a somewhat less stellar AR of 2. A D5 roll if 2 will see him have and activity level of TWO with one Initiative Point for the turn but any higher roll will result in and activity level of just ONE, again with one Command Point.
For those unsure about this mechanism the following table shows the activity level (and initiative points) a commander will have based on the result of their d5 roll:
|
D5 roll |
| Activity Rating: |
2 |
3 |
4 |
5 |
| AR2 |
AL2 (1 CP) |
AL1 (1 CP) |
AL1 (1 CP) |
AL1 (1 CP) |
| AR3 |
AL2 (1 CP) |
AL3 (2 CP) |
AL1 (1 CP) |
AL1 (1 CP) |
| AR4 |
AL2 (1 CP) |
AL3 (2CP) |
AL4 (2 CP) |
AL1 (2 CP) |
| AR5 |
AL2 (1 CP) |
AL3 (2 CP) |
AL4 (2 CP) |
AL5 (3 CP) |
Activating Commanders
Red cards activate British commanders, (including loyalist, Hessian and other allied commanders).
Black cards activate American rebel commanders, (including French and other allied commanders).
The value on the card indicates which commanders are activated (based on their activation level for this turn.
Example: The card drawn is a red-3 (e.g. 3 of hearts). This will activate any British commanders who have an activity level of THREE for the current game turn
The first card drawn each turn will determine the length of the game turn. The time elapsed in minutes is the value of the card plus one, then multiplied by 5. So an ace = 10 minutes and a 5 = 30 minutes.
Command Radius
Commanders who are not attached to a unit have a command radius of 24". Within this radius they have no penalty when activating units and can expend initiative points. Beyond this there is a penalty for activations and command points cannot be used.
Commanders attached to a unit have their radius reduced to 12"
Activating Units
Units who recovered from rout this turn may not activate. Other units can be activated when their commander is.
To activate a unit, a “hand” of 12-sided dice (d12s) is rolled. This begins with six dice, but one is removed for every disruption point (DRP) currently suffered by the unit (maximum of three).
To achieve a success each die rolled must score equal or below the total of its quality and its commander’s quality. The score required is reduced by one if the unit is outside the commander's radius, reduced by one of the unit is not of the commander's own brigade (unless he is the CinC) and reduced by one for every 6 stamina losses on the unit.
If the unit's commander has been killed and not replaced then units of that command will attempt to activate when the next appropriate ace is drawn from the activation deck but cannot add the commander's quality to its activation roll. Alternatively a unit may be activated by another friendly commander when that commander activates and expends a command point while (see tariffs below).
One successful d12 roll earns one action, three successes earn two actions and if all six dice succeed then unit may perform three actions. Actions are MOVE, CHARGE, SHOOT or RALLY (or any combination).
If the turn is of 25 or 30 minutes' duration all units that activate gain an additional action
If all of the dice rolled fail to achieve a success the unit must take an immediate morale test. This cannot be avoided by a commander using Initiative Points and a commander cannot remove DPs from a unit prior to testing.
A unit may only attempt to be activated by one commander in each game turn.
NOTE: Units who are routing do not roll to activate but take a morale test (see below) instead. If they rout off the table then they are lost.
Action tariff:
- 1 Point
- Rally off 1DRP
- Shoot with musket or carbine
- Shoot with cannister
- Move
- About face
- Change formation
- Limber/unlimber artillery
- 2 Points
- Shoot with rifles
- Shoot with roundshot (medium range)
- Charge
- 3 Points
- Shoot with roundshot (long)
Command point tariff:
- Commander may issue to units he has activated, that are also in command radius:
- Issue an additional action (not order) to a unit that the commander has activated this turn
- Activate unit not of own brigade
- All commanders:
- Move commander 12" including attaching or detaching from units
NOTE: expending command points is the only way an unattached commander can move, so bear this in mind to ensure commanders don't fall too far behind their units! Attached commanders will move with the unit they are attached to.
Morale
There are two types of test:
MORALE TESTS use a base "to succeed" of 2 x Unit Quality
COHESION TESTS use a base "to succeed" of Unit Quality + Unit Density
Modifiers to the "to succeed" number
- -2 for every full 6 stamina losses inflicted on the unit
- -1 for every attacker impetus point above own quality when being charged
- -? subtract the difference in losses between winner and loser when testing for losing a melee
- +1 if the unit's commander and/or the CinC is attached to the unit
Roll three d12,
Rolls of "1" always succeed, rolls of "12" always fail.
Successes |
Effect |
0 |
Unit destroyed/surrenders |
1 |
Rout, facing away from the enemy. Increase to 3DP if not already. |
2 |
Pushed back 1 move facing the enemy unless in fortifications or behind an obstacle |
3 |
Carry on |
Units who rout must take a further morale test instead of an activation roll in subsequent turns, until they roll a "pushed back" or "carry on" result. If rout moves take them off the table then the unit is lost.
Push Back move: 2dAv" (deployed artillery destroyed)
Rout move: Infantry 6"+dAv, Cavalry 12"+ dAv, Artillery destroyed
Rally
A rally action allows a unit to remove one DRP.
Movement
For each movement action, a unit can move the distance shown below. Commanders attached to a unit when it moved will accompany it unless they expend an Initiative Point to detach.
Infantry for each action expended: in column move 9 inches (12 inches on road). In any other formation (deployed) they deduct their density from each 12” move. For example, skirmishing infantry move 9" (12" -3 density), Close order infantry in 3 ranks move 4" (12 -8 density)
Cavalry for each action expended: in column move 12 inches (18 inches on road). In any other formation they roll two d12 and must move in inches exactly: either score, the combined score or the difference in scores.
Limbered artillery for each action expended: move 12 inches on roads and 6 inches elsewhere.
Unlimbered (deployed) artillery for each action expended: move dAv+2 inches if light, dAv inches if field and d3 inches if heavy.
If crossing a minor obstacle, take 1DRP (to the maximum of 3). Artillery may not cross obstacles.
If moving in light woods there is no deduction as this is factored into movement rates
If moving in heavy woods, difficult terrain, up steep hills, etc, take 1 disruption if deployed (except deployed artillery who cannot move in this context); deployed cavalry cannot combine their d12 rolls
If moving in heavy woods, deduct 2 inches from the movement distance for infantry and artillery, cavalry must move the lowest of their two movement rolls.
Movement is further modified if there is difficult terrain such as steep hills (scenario specific)
Retrograde movement
This is any move where the unit moves backwards. It is allowed for infantry and unlimbered artillery, however any unit moving in this way must take a DP to reflect the disruption caused, up to its maximum limit of three. If the unit already has 3DPs then it takes a morale test instead.
Cavalry and limbered artillery may not use retrograde movement. They must turn around (one action) then move (more actions) and then turn around again (one action), possibly taking several moves to complete the intended manoeuevre. This at least does not cause DPs to be taken and the option is also open to infantry.
Interpenetration
Unlimbered artillery sections or Infantry of density 3 or 4 can move through any friendly unit, or any friendly unit may move through them.
Passage of lines
This may be attempted if infantry of density 5 or more wish to move through another infantry unit of density 5 or more (or unlimbered artillery) and both are of quality 3 or greater. If this is also retrograde movement then those rules are applied first. When one unit moves through another roll 1d12.
If the result is a "1" then the attempt fails and the moving unit must stop when it makes contact with the static unit. If the result is equal to or greater than the combined quality values of the two units then there is no adverse effect and the moving unit continues through the static one. If the result is lower than the combined quality values (but greater than 1) then each unit takes DRP up to a maximum of three.
- 1DRP if the lowest density involved is 5
- 2DRP if the lowest density involved is 6
- 3DRP if the lowest density involved is 7+
If a unit already has 3DPs then it takes a morale test instead.
There is no deduction from movement distance when conducting a successful passage of lines, even if DRPs are taken.
Shooting
A unit may only shoot once in a turn. If additional shooting actions are taken these add to the unit's potential effectiveness against its target.
Musketry
| Weapon: |
Effective Range |
Firepower |
| Musket volley |
0-8" |
3 d12 |
| Musket skirmishing |
8-16" |
1 d12 |
| Rifle |
0-24" |
2 d12 |
| Carbine |
0-6" |
2 d12 |
Artillery
| Weapon: |
Light |
Field/Heavy |
Seige |
Firepower |
| Close Cannister |
- |
0-12" |
0-15" |
4 d12 |
| Cannister |
0-18" |
12-24" |
15-30" |
3 d12 |
| Roundshot (medium) |
3' |
4' |
5' |
2 d12 |
| Roundshot (long), includes howitzers and mortars |
6' |
8' |
10' |
1 d12 |
"Size" per section
(assuming 1:10 fig/man ratio) |
Very Light: 6
Light: 10 |
Field: 12
Heavy: 16 |
Seige: 24 |
|
Amusettes are treated as very light artillery that always shoot as medium range roundshot (i.e. max range of 3', with no cannister option)
If shooting up a steep hill, add 50% to the measured range
Add 1d12 for each additional shooting order (not action) given to the unit
The number needed to succeed on each d12 is the target density or less, modified by comparing the unit sizes.
- Infantry manning fortifications are assumed to have density 4 for the purposes of resolving shooting hits.
- Units in column of march are assumed to have density 8 for the purposes of resolving shooting hits
Modifiers:
- If the shooter and target are the same size then there is no modifier.
- If the shooter is larger than the target by 3:2 then add 1 to the number needed
- If the shooter is larger than the target by 2:1, add 2
- If the shooter is larger than the target by 3:1, add 3 and so on..
- If the target is larger than the shooter by 3:2, then deduct 1 from the number needed
- If the target is larger than the shooter by 2:1, deduct 2
- If the target is larger than the shooter by 3:1, deduct 3 and so on..
- If the target is in light cover, deduct 1 from the number needed
- If the target is in significant cover, deduct 2
- If the target is in fortifications, deduct 3
(Reduce this cover effect by one if shooting is by roundshot, howitzers or mortars)
- If the target is in woods and the shooter is not, deduct 1 from the number needed
- Deduct 1 for each full 3" of the shooting that goes through woods
- Add 2 if any of the following apply:
- If the shooter is enfilading the target and shooter is artillery or is infantry with density of 5 or greater
- If the shooter is unsing rifles
Rolls of "1" always pass. Rolls of "12" always fail
Each success inflicts one hit on the target unit.
Hits are taken first as Disruption Points (DRPs). Once a unit as accrued three DRPs any further shooting hits will inflict stamina losses. Disruption Points can be removed by rally actions but stamina hits are permanent and negatively affect unit morale and activation when tested.
A unit may split its fire between two targets where this is a reasonable thing to do because it cannot bring its full firepower to bear on a single target unit. Each shot is taken with a portion of the unit's size counted. For example a 24 figure unit may fire 8 figures at one target and 16 figures at another.
Visibility
Line of sight will be interrupted by buildings, hills and other such obstacles
Light woodland does not obstruct line of sight, but will count as light cover for the purposes of shooting.
Heavier woodland ("woods") have a cumulative modifier for shooting, reducing its effectiveness for each 3".
Those accustomed to other rules might find the artillery ranges rather long, however they do correspond to realistic ranges at our chosen ground scale and emphasise the value of artillery in the 18th Century. They are prevented from being “wonder weapons” by limiting their shooting through the activation system.
Charges and melee
A charge is a move that brings the moving unit into contact with one or more enemy unit.
The charging and resulting fighting is resolved in the following order:
- Activate and move any charging units as part of the usual activation process
- Check if the target evades away from the charge(s)
- If the charge will make contact, roll dice to determine the impetus of the charging unit(s)
- Roll dice to determine the outcome of the melee
Multiple unit melee
This can occur if the chargers all activate at the same time, either because they are part of the same brigade, or because they are in brigades whose commanders activate at the same time. In these cases move each charger into contact, then calculate the impetus for whichever charging unit the owning player chooses but use the combined unit size of all attacking units, then resolve the melee. This process is not compulsory. It is permissible for units activating at the same time to conduct and resolve charges/melee one after the other.
Evade
Infantry units of density 3 or 4 who are charged by an infantry unit of density 5 or more can (must if in the open) evade by moving back (2dAv + Unit Quality inches) rather than standing to defend unless they occupy hard cover or fortifications.
The evading unit must take a DP (up to its maximum of three) and a morale test at the completion of its evade move.
The attackers can either move their full distance (including contacting other enemy units) or stop at the point the defenders had occupied. If the attacker’s move takes them into contact with evading defenders, the defenders are destroyed.
Evading takes place before a charger needs to roll for impetus.
Determine impetus
Prior to resolving a melee it is necessary to determine the impetus of the charge(s). Apply the following process to each charging unit, or to counter-charging units if the tables have turned in a deferred melee.
Units may enter into melee as part of a move if they can move far enough to make contact with a non-evading enemy unit (using a movement action) and are able to close as described below:
- Roll 4 d12.
- Add an extra d12 for each DP currently on the target unit
- Deduct a d12 for each DRP on the charging unt
- Add an extra d12 if the chargers have a commander attached
- Add an extra 2 d12 if contacting the target unit in its flank or 3 d12 if contacting to the rear
- Add 1, 2, 3...d12 if the attacker(s) are 50% larger, twice as large, three times as large as the defender
- Deduct 1, 2, 3...d12 if the defender is 50% larger, twice as large, three times as large as the attacker(s)
- Deduct 1 d12 if charging up a steep hill
- Add one if the attacker is using cold steel (see below)
- Add one if chargers are heavy cavalry
- Deduct three d12 if charging cavalry are being countercharged by cavalry
"cold steel" ability: British or European regular infantry, Continental infantry of quality 4+, cavalry of unit quality 3+ ; in all cases cold steel cannot be used once the unit hass suffered 6 or more stamina losses.
The score needed to succeed is double the charging unit’s quality
Count the number of dice succeeding and this will be used as a modifier when resolving the melee
Check to stand (new)
If the attacker's impetus is greater than the defender's unit quality, then the defending unit must take a cohesion check and abide by the result. If the defenders falls back or routs the attacker may occupy the ground ceded.
Resolve melee
The charger rolls 6d12. Add 1d12 if the charger has used the cold steel ability; in such cases a melee can never be drawn!
Experiment: I am currently playtesting a rule where melee involving cavalry will deduct two dice from this roll
The basic number needed to succeed is 3 or less.
This is modified as follows:
- Add one to the number needed for each impetus success
- Add one if the defender has no bayonets
- If the defender is in light cover, deduct one from the number needed to succeed
- If the defender is defending significant cover, deduct two
- If the defender is defending fortifications, deduct three
Regardless of modifiers, 1s are always a success and 12s always a failure.
Count up successes and failures.
- Each success inflicts one stamina loss and ine DRP (to max 3) on each defending unit
- Each failure inflicts one stamina loss and one DRP (to max 3) on each charging unit
- If there are more successes than failures, the defending unit(s) must take a cohesion test; if this is passed, the opponent must test cohesion
- If there are more failures than successes, the charging unit(s) must take a cohesion test; if this is passed, the opponent must test cohesion
- If there are equal numbers of successes and failures, all involved units must take a cohension test
If any opposing units remain in contact after all cohesion tests have been completed, move all charging units back 3".
Pursuit
Routed defenders can be pursued by successful attackers. In the case of a cavalry melee involving chargers and countercharges the winner may pursue the loser.
Infantry pursuit move: dAv+Unit Quality inches
Cavalry pursuit move: dAv+d12 inches
Risk to commanders
When a commander is attached to a unit that suffers losses (disruption or stamina) due to shooting or melee there is a chance that the commander will be wounded or killed.
In such instances roll 1d12. If the die roll is equal to or less than the number of losses taken the commander has been struck. Subtract 2 from the die roll if the losses were caused by rifles shooting.
If struck roll a further d12 and deduct this from the commander's constitution (9 by default or as defined by a scenario). If the constitution falls below one the commander is removed from the battle.
At the end of the battle, determine the fate of any removed commander(s) by rolling a d12:
1-4: Stunned: recovers in time for the next battle
5-7: Light wound: recovers in time for the next battle but has consittution reduced by one
8-10: Serious wound: takes no further part in the current campaign
11-12: Transition to Glory: the commander has been mortally wounded and does not survive
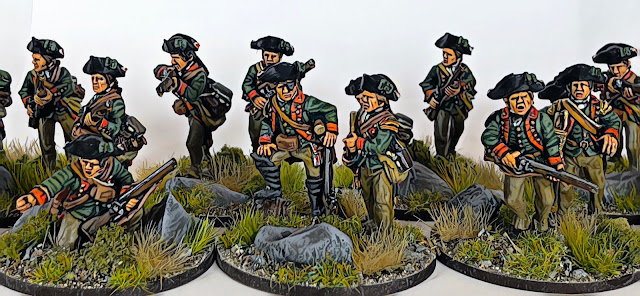
Photo of my figures by Dr Phil Hendry
Playsheets - these should match the v9.3 rules, apologies for any discrepancies
AND I THINK THAT IS IT FOR NOW!