In giving my European 18th Century games some narrative context I have given some thought to a semi-fictional setting into which I can insert small clashes between French, Hessian and British forces without getting too hung-up on the history and absolute authenticity.
To this end I present the reader with a brief outline to the Trinket War and the opening clash.

The Trinket War is fought in and around the small state of Tattemberg which nestles in the south-west of Baden with the River Rhine forming the majority of its western border (with France) and its southern border (with Switzerland). The Tattembergers have two principal exports, the first being a particularly fine, pale amber beer "Quellebier" extracted from the Pilsner Springs that lie in the northern mountains and the second being a distinctive from of competitively-priced souvenir items crafted by artizans across the land. These "Trinkets" are named for Sir George Trinket who settled in Tattemberg after his exile following the English Civil War and founded the first company dedicated to export of noveltly items to the people of Europe and even further afield. Wherever gift shops exist, you will find Tattemberg-manufactured trinkets, which are somewhat uncharitably also known as "Tatt" after their state of origin.
As the 18th Century reaches the year 1780, political eyes are turned mostly towards the conflicts in Britain's colonies in America and India. Distraction creates opportunities however and the French government detects an opportunity to seize Tattemberg and control the trinket and spring beer trade, to the benefit of French brewers and crafters. This may not prove so easy as it may appear. Tattemberg has remain closely allied to the British, through its relationship with the Trinket family, since the Restoration. This in turn brings strong links to other states along the Rhine, in particular Hesse-Cassel and in common with these the armed forces of Tattemberg are modelled on the Prussian army.
While the French understand that their invasion will be no pushover, they take the gamble that both Britain and the hessian states are heavily committed elsewhere and on 1st June 1780 they begin to push out of Alsace and across the Rhine...
Clash at Kleinebrucke, 1st June 1780
This scenario was inspired by scenario #5 in "One-Hour Wargames" by Neil Thomas.
The Kleinebrucke is a crossing of the River Rhine that carries a minor road running between Blotzheim in Alsace and Haarket in Tattemberg. This is an area that is away from the main trade routes and there is no permanent garrison, just a small customs house. The forces available are given below.
The French advance-guard consists of six units under the command of the Duc de L'Orange (quality 3):
- 1st battalion, Regiment Royal Tourpont (20 figures, quality 3)
- 2nd battalion, Regiment Royal Tourpont (20 figures, quality 3)
- Grenadier and Chasseur companies, Regiment Royal Tourpont (16 figures, quality 4)
- 1st squadron, Hussar Regiment d'Etrangers (9 figures, quality 3)
- 2nd squadron, Hussar Regiment d'Etrangers (9 figures, quality 3)
- 1st battalion, Chasseurs d'Alsace (12 figures, quality 4)
The Tattemberg forces have been alerted to French movement and the Baron Fritz von Wegbringen (quality 3) has the following units converging on Kleinebrucke:
- Fusilier Regiment von Kodenchypz (20 figures, quality 3)
- Fusilier Regiment von Schlangewurst (20 figures, quality 3)
- Grenadier Regiment Fleischkuchen (20 figures, quality 3)
- 1st section, Artillery battalion von Boomingen (1 light gun and crew)
- Chasseur battalion von Hahnchinabun (12 figures, quality 4)
- Bratensosse Jager (12 figures, quality 4)
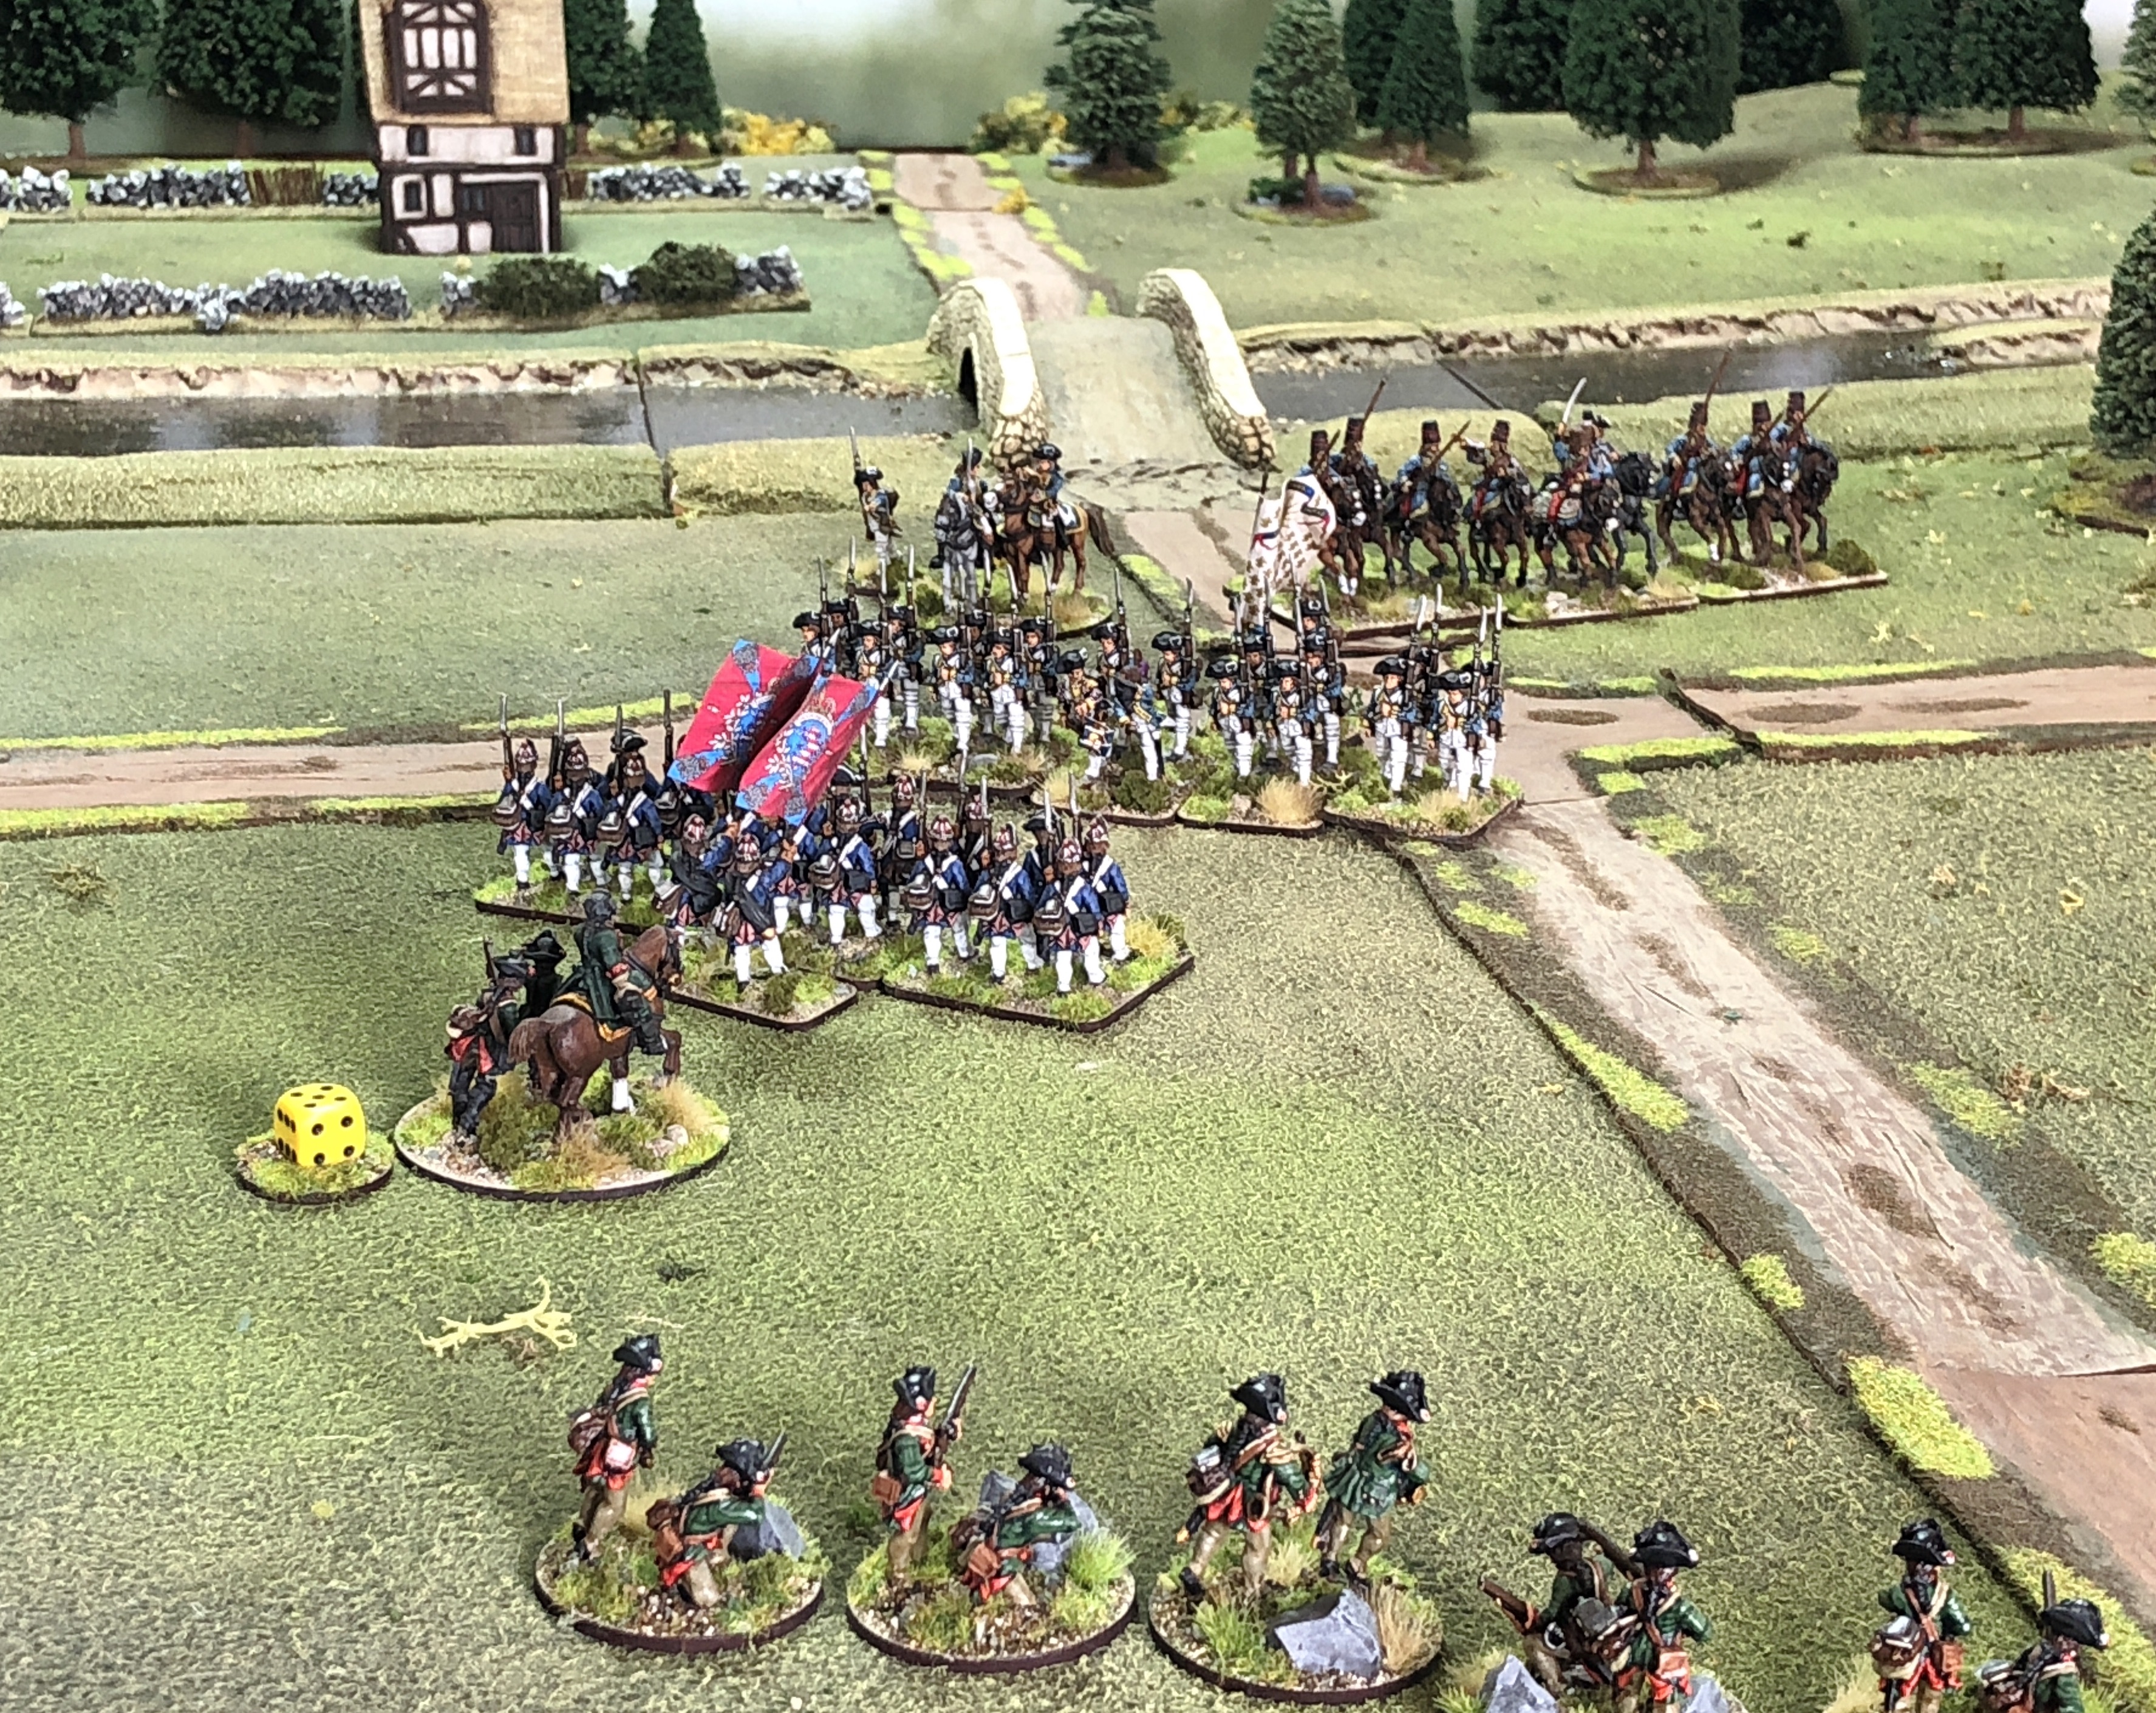
The following pictures attempt to show the battle as it progressed.
The French begin with one unit on the Tattemberg side of the bridge and are aiming to secure and enlarge this position. A die roll determined that this unit would be the 1st battalion of the Royal Tourpont Regiment.
As the first few turns are completed, both armies begin to assemble. The Tattembergers see the arrival from the south of a regiment of fusilers and the jager, while the French bring up their first squadron of hussars.
By turn three we see the Fleishkuchen Grenadiers and the artillery also arrive from the south, while the second battalion of Tourpont reinforce the first. Musketry commences, while the jager sensibly get out of the way of the hussar threat.
Time moves along and the musketry in the centre grows more intense, with the French getting the worst of it when the artillery commence with cannister fire. Meanwhile the Alsace light infantry and the Tourpont flank companies cross the bridge.
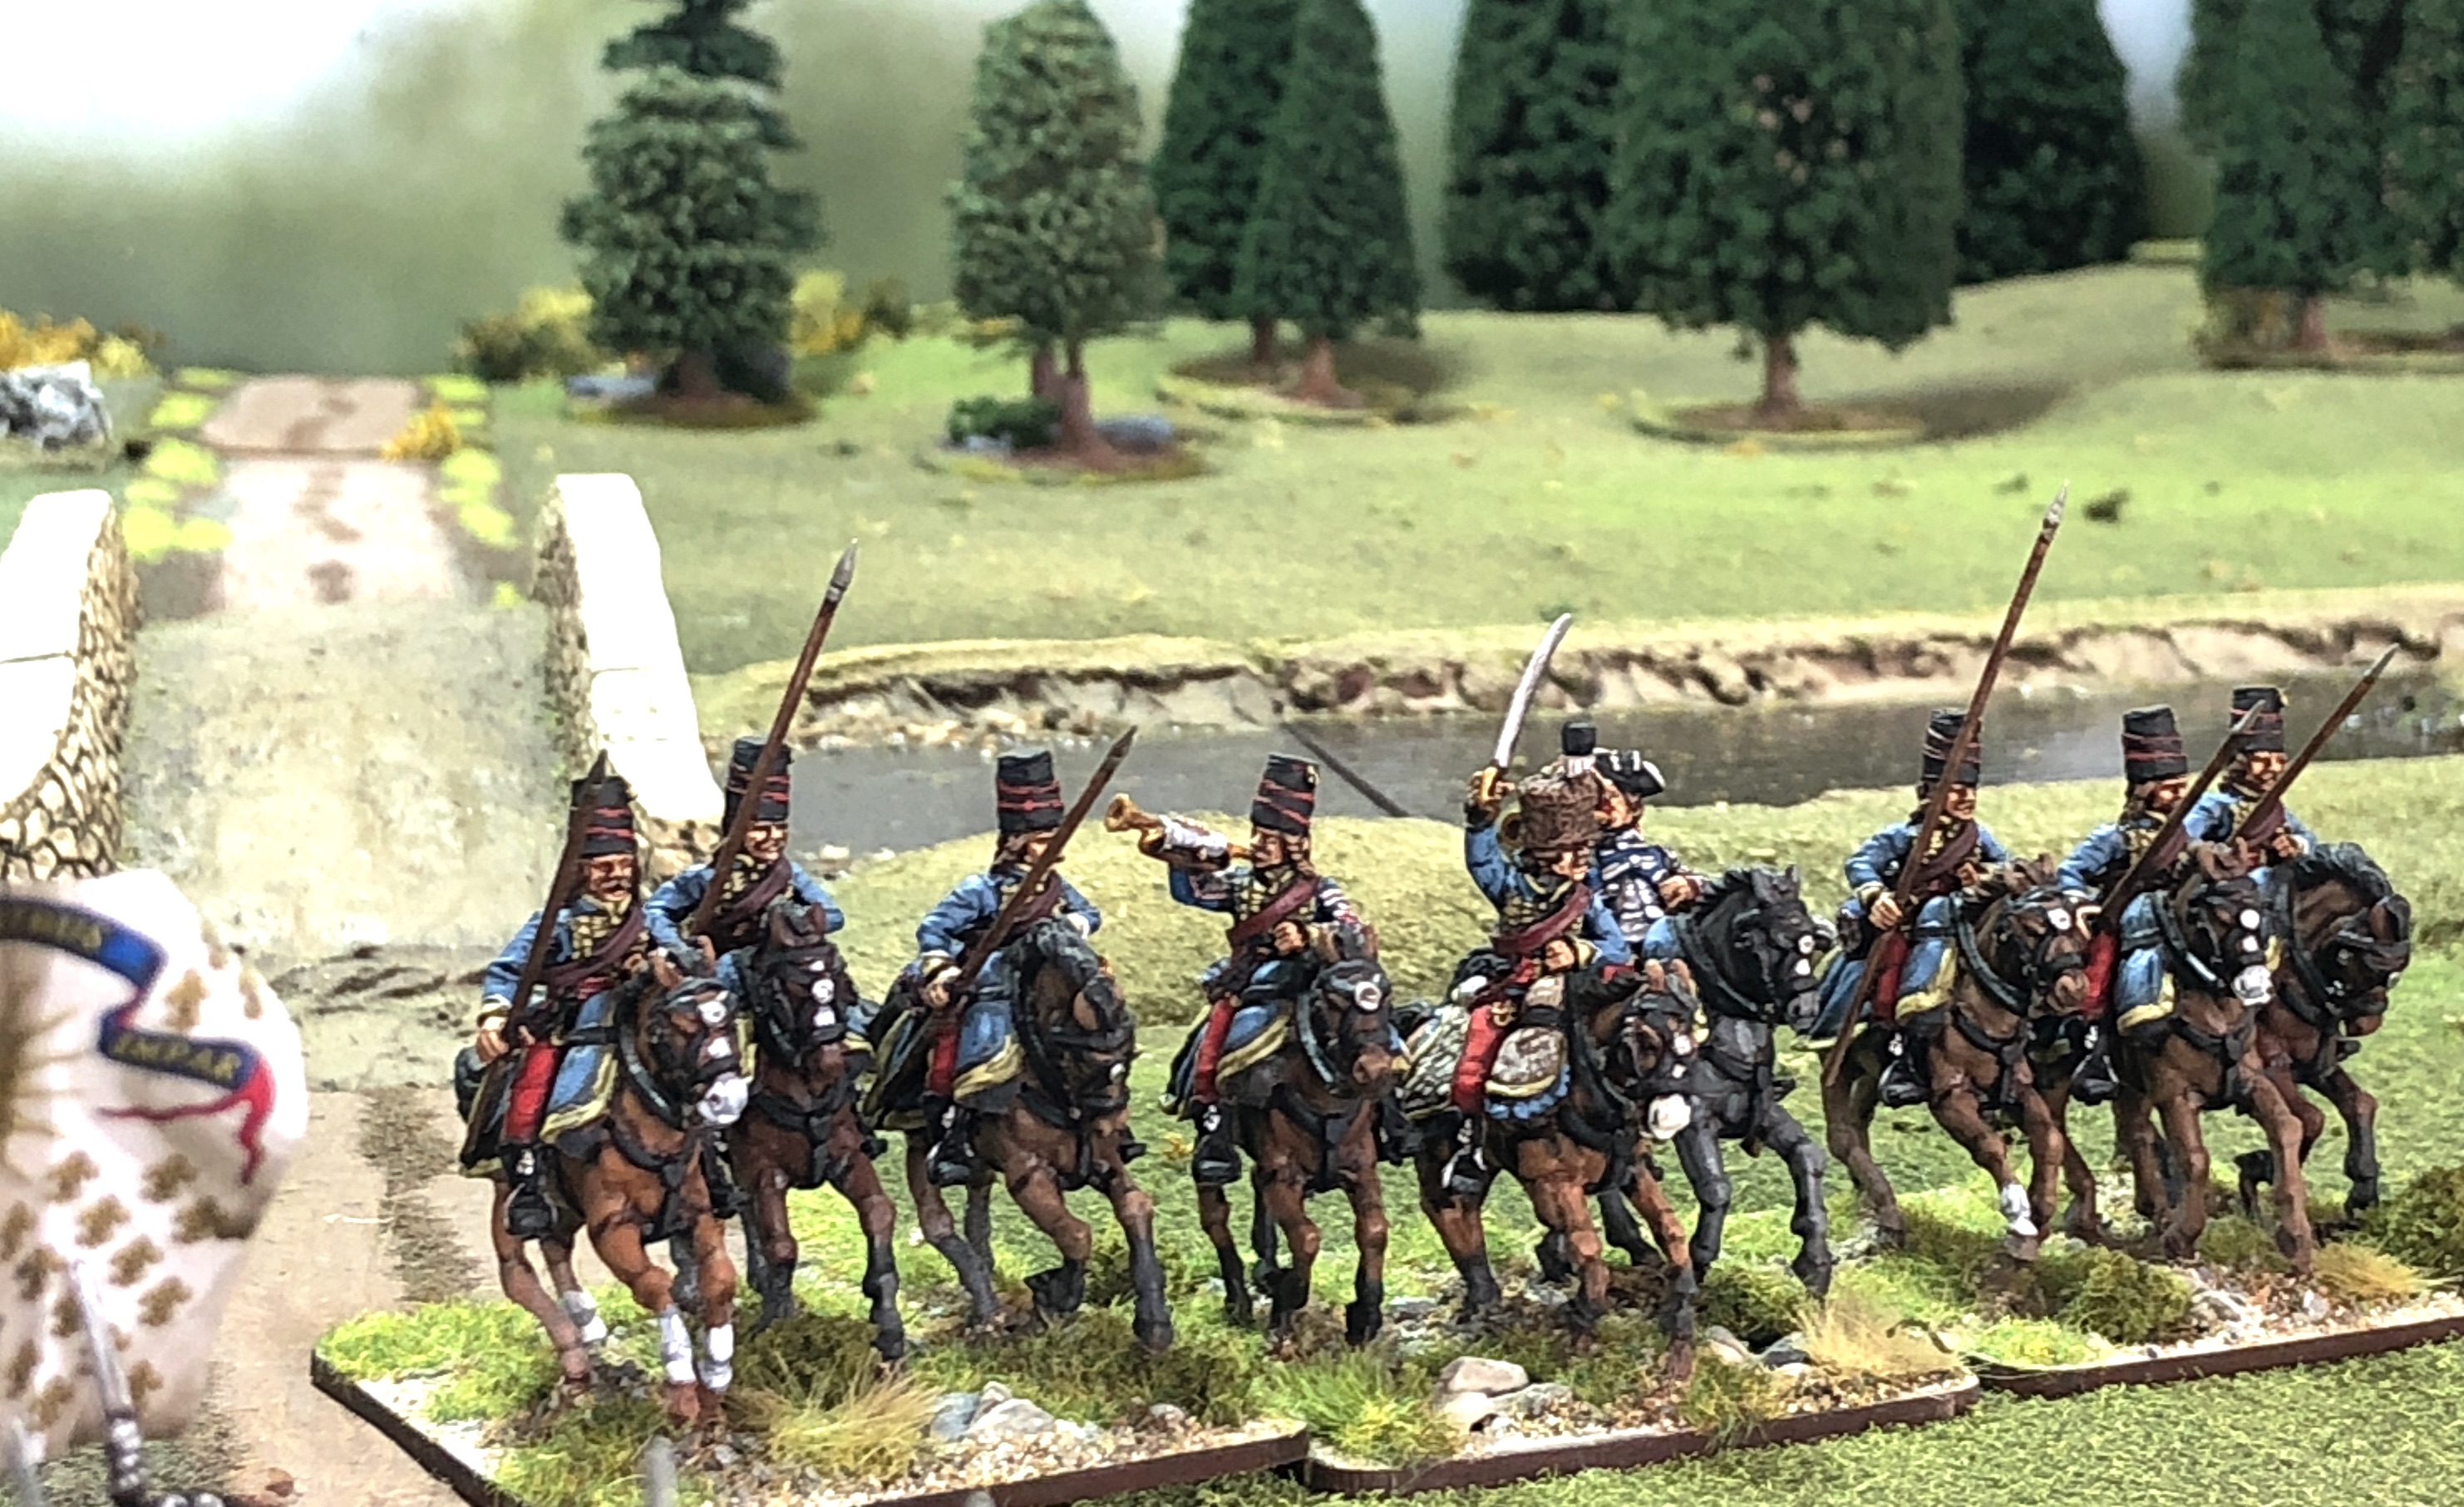
The 1st squadron of hussars attempt to charge the grenadiers but baulk in the face of the well-ordered infantry and will shortly feel the heat of their shooting.
Rather against the run of play, the Kodenchypz fuiliers flinch from a musketry duel that they were winning. This causes the artillery crews to abandon their section of guns too. The French gain a welcome respite and sense an opportunity to resume the offensive as their second squadron of hussars finally arrive to bolster their now badly shot-up comrades, who had tangled not only with the grenadiers but also the freshly deployed Schlangewurst fusilers. The jager stand-off and keep peppering the 2nd battalion of Tourpont with their rifles:
The French team-up their hussars and the Alsace light infantry but fail to break through the Tattemberger infantry despite hitting them with two charges. Eventually one hussar squadron routs.
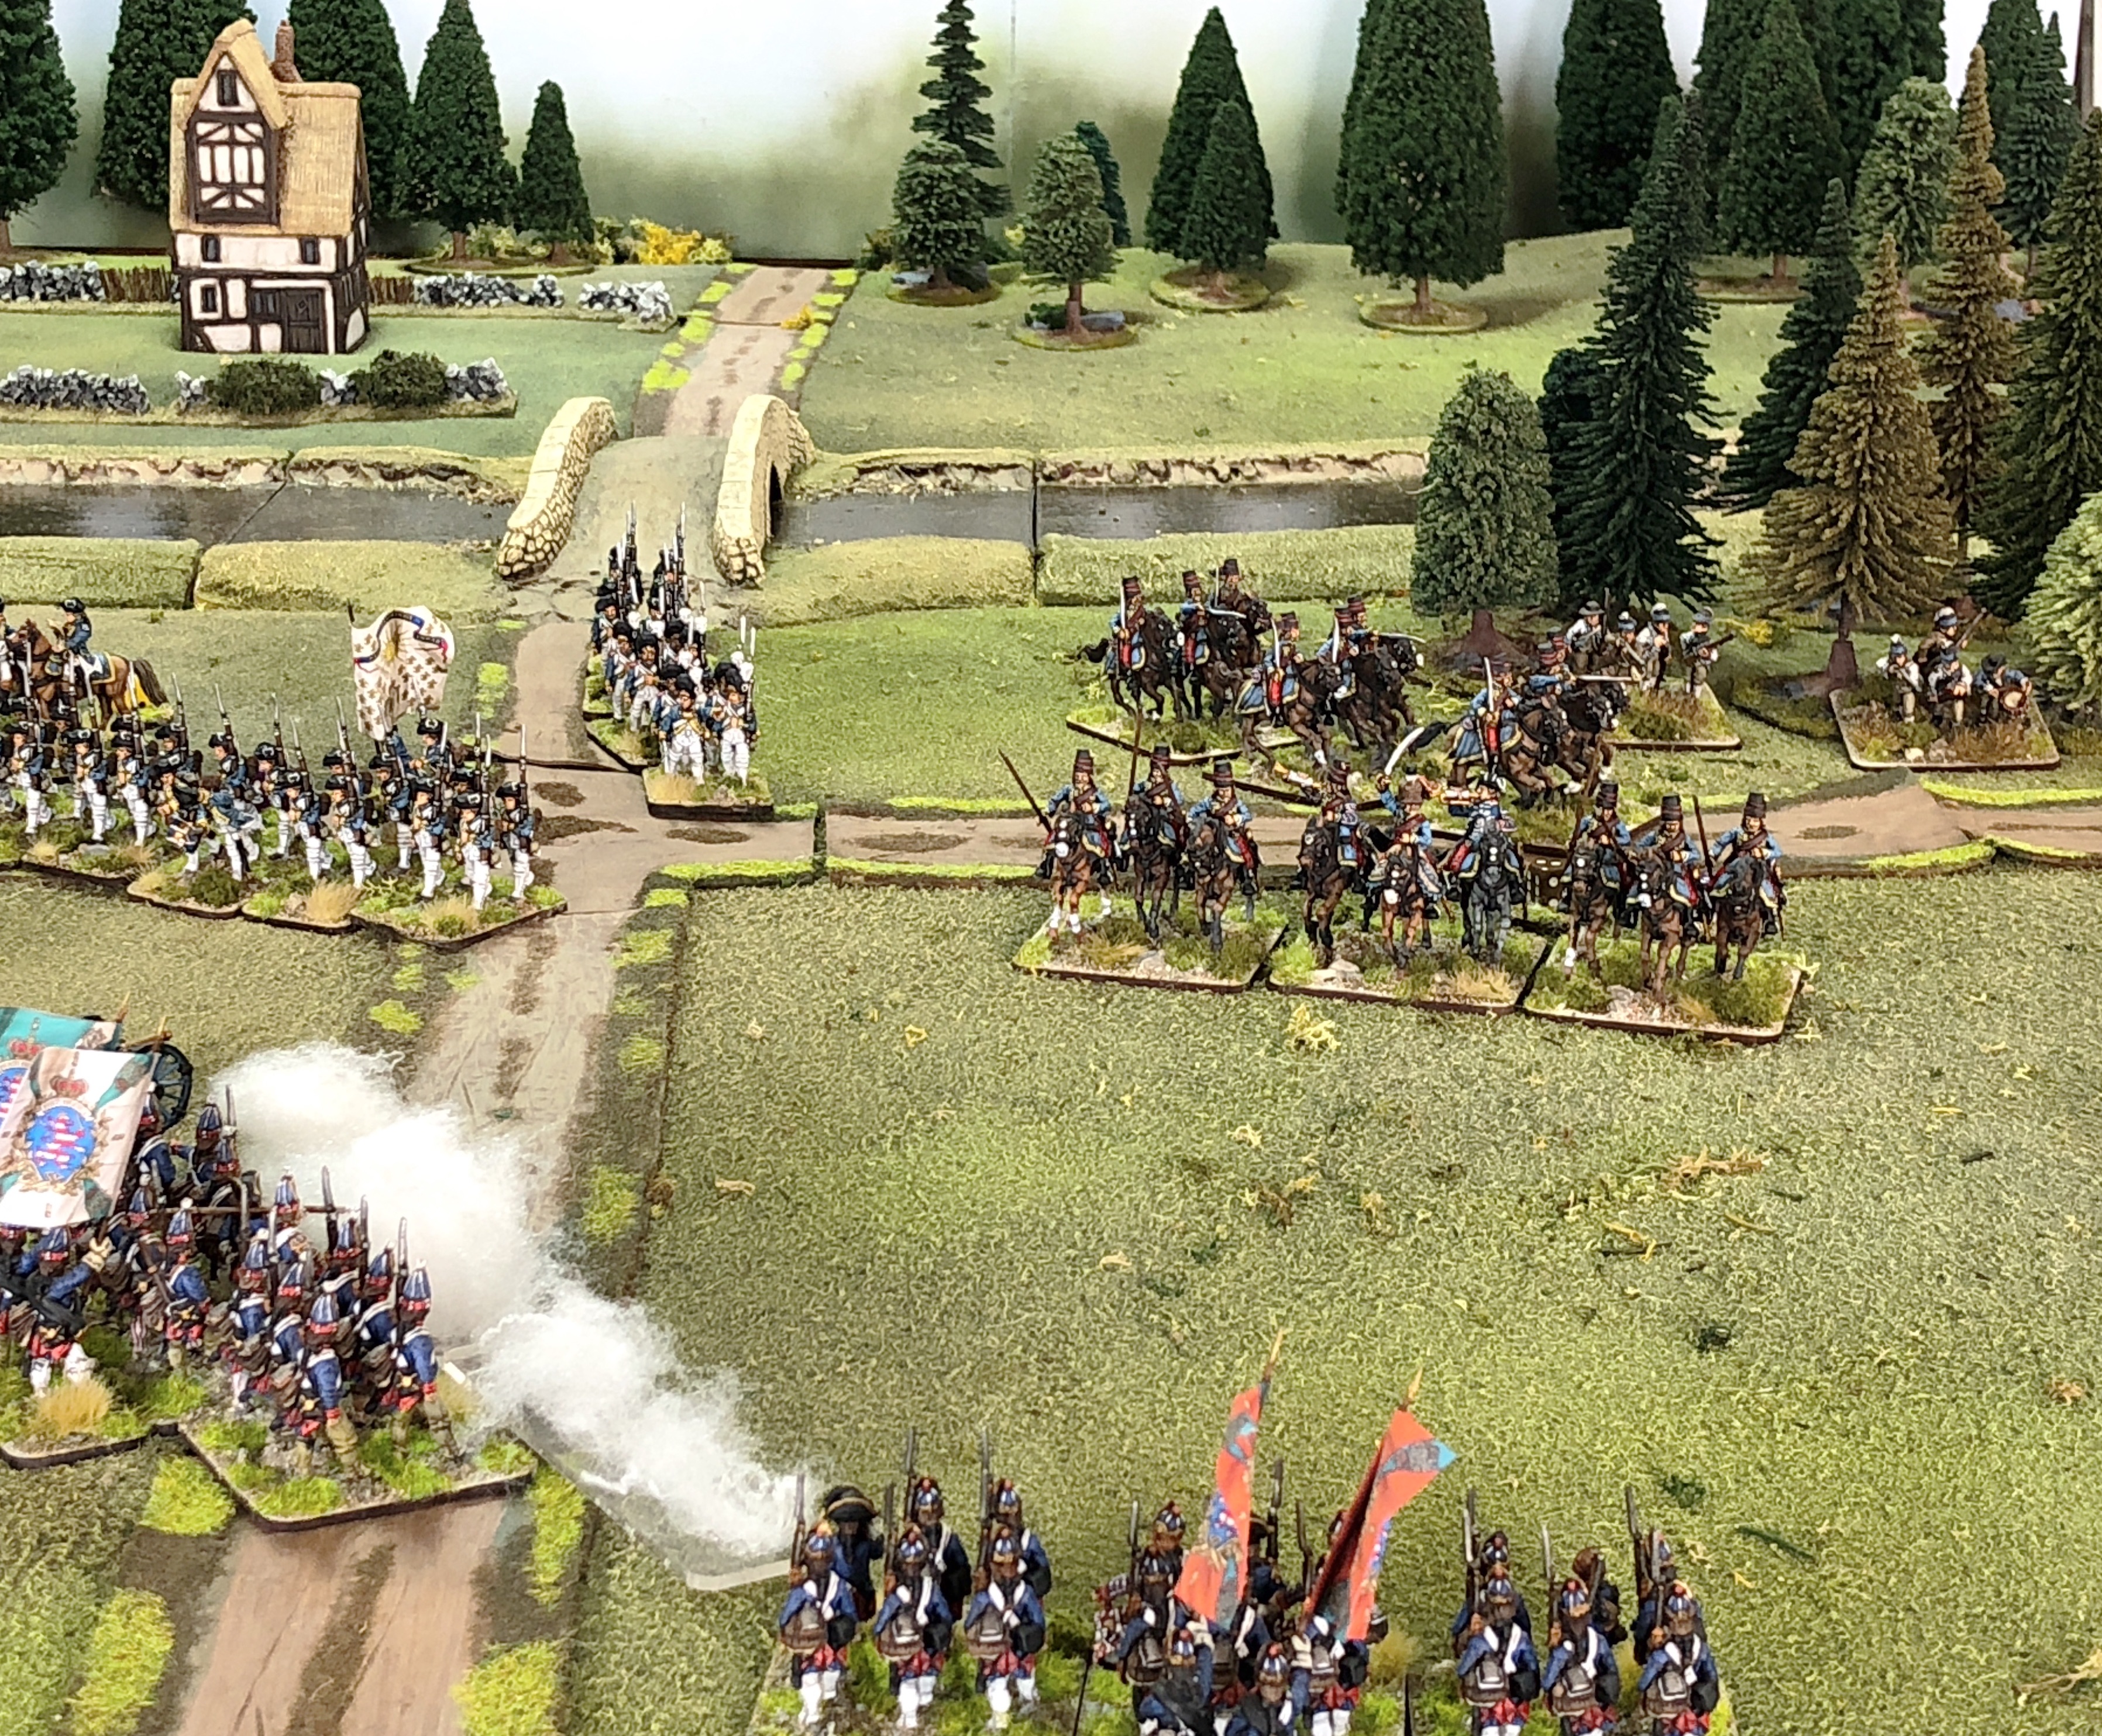
In the centre the fusiliers recover and re-enter the fray, with the artillery crew also re-manning their guns. This proves decisive and after a couple more turns both battalions of the Royal Tourpont can stand no longer and rout.
This leaves the Duc de L'Orange with just three units. Both the flank company battalion and the remaining hussars are distinctly shaken and there is a real risk that they could rout and leave the Alsace light infantry isolated on the "wrong" side of the river. Deciding it is time for a caution retreat he attempts to disengage the flankers, but an unfortunate dice roll results in a surrender! The hussars and light infantry rapidly pull back to act as a rearguard and provide mutual support as they return to the friendly bank...
A glorious day for Tattemberg and an excellent run-out for the Bloodybacks rules in a different setting.
Foaming steins of Quellebier all round!
The use of formed infantry on both sides saw units rapidly accrue disruption and stamina losses. Reintroduction of my experimental smoke rules effectively modulated this by modifiying "to hit" scores when shooting, so gives me something to work on (more smoke markers at the very least!). Making most units just quality 3 (second-line regulars) gave the fairly fast and decisive game I was looking for, but makes me think the morale penalties for stamina losses might be just a bit too harsh.
So, where will the war strike next?
Will the French make a strike for the Pilsner Springs?
How will interruption of trinket export affect the economy?
Will I run out of stupid unit names?
Keep checking back to find out!
I am aware that any discussion of war in Europe currently has a limited scope for humour as the real world is not a nice or reassuring place right now. No offence is intended. This really is just an excuse to get some model soldiers on the table.


Well done! Lovely m& background. Thank you for the light distraction. Much Appreciated.
ReplyDelete~ Tom T
Most enjoyable and very colourful. Thanks
ReplyDeleteStephen
Thoroughly enjoyable post. I’ve only recently discovered your blog, but liking what I see. Poised to try out Bloody Backs so useful to see how games play out.
ReplyDeleteThanks. I hope you get some fun games out of them!
DeleteExcellent, Steve, and some brilliant names in there too!
ReplyDelete